


Setting Up a Django Project
How to settup and Install Django for your backend or fullstack project


Django(Python Django) is a high-level web development framework. It provides and flexible project structure and makes it easier to start new projects, In addition to that it follows the Model-View-Controller(MVC) architectural pattern, commonly referred to as Model-View-Template(MVT) in Django.
In this piece, we will document the procedural steps to setting up and installing a Django project.
While there are a number of ways to get started, feel free to explore available options on the internet and go for whatever makes you comfortable.
Prerequisites
Before we get started, here is a checklist:
Creating a Virtual Environment(with virtualenv)
To get started, we will create a virtual environment to install and run Django. Using virtualenv makes it way easier to do so(I think ... 🤔 💭).
Open a terminal (CMD), and go to a working directory or a location where your project files will be. To create an environment, run the following:
virtualenv <project_name>
Replace the <project_name> with the name of the project, i.e. My project will be: django-starter
virtualenv django-starter

Once that is done, you need to activate the environment. Before you do that, ensure that your terminal is in the project directory, "django-starter".
To activate the environment, run the following:
source bin/activate
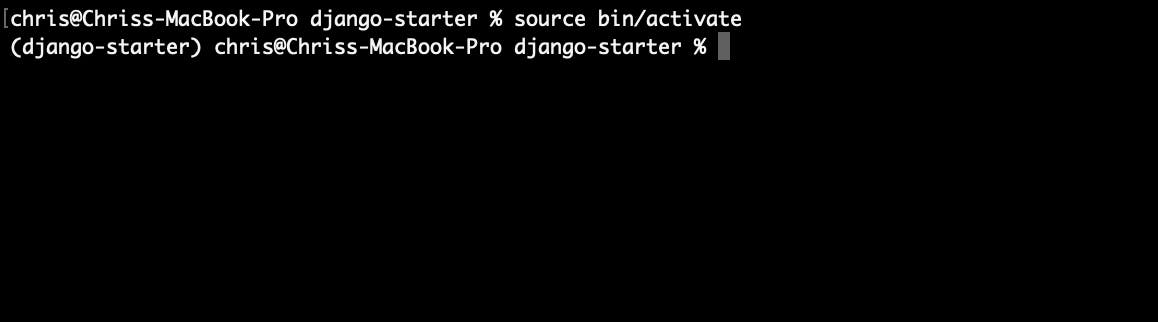
Once the environment is activated, you will notice the environment will be enclosed by brackets on your terminal path:
(django-starter) chris@Chriss-MacBook-Pro django-starter %
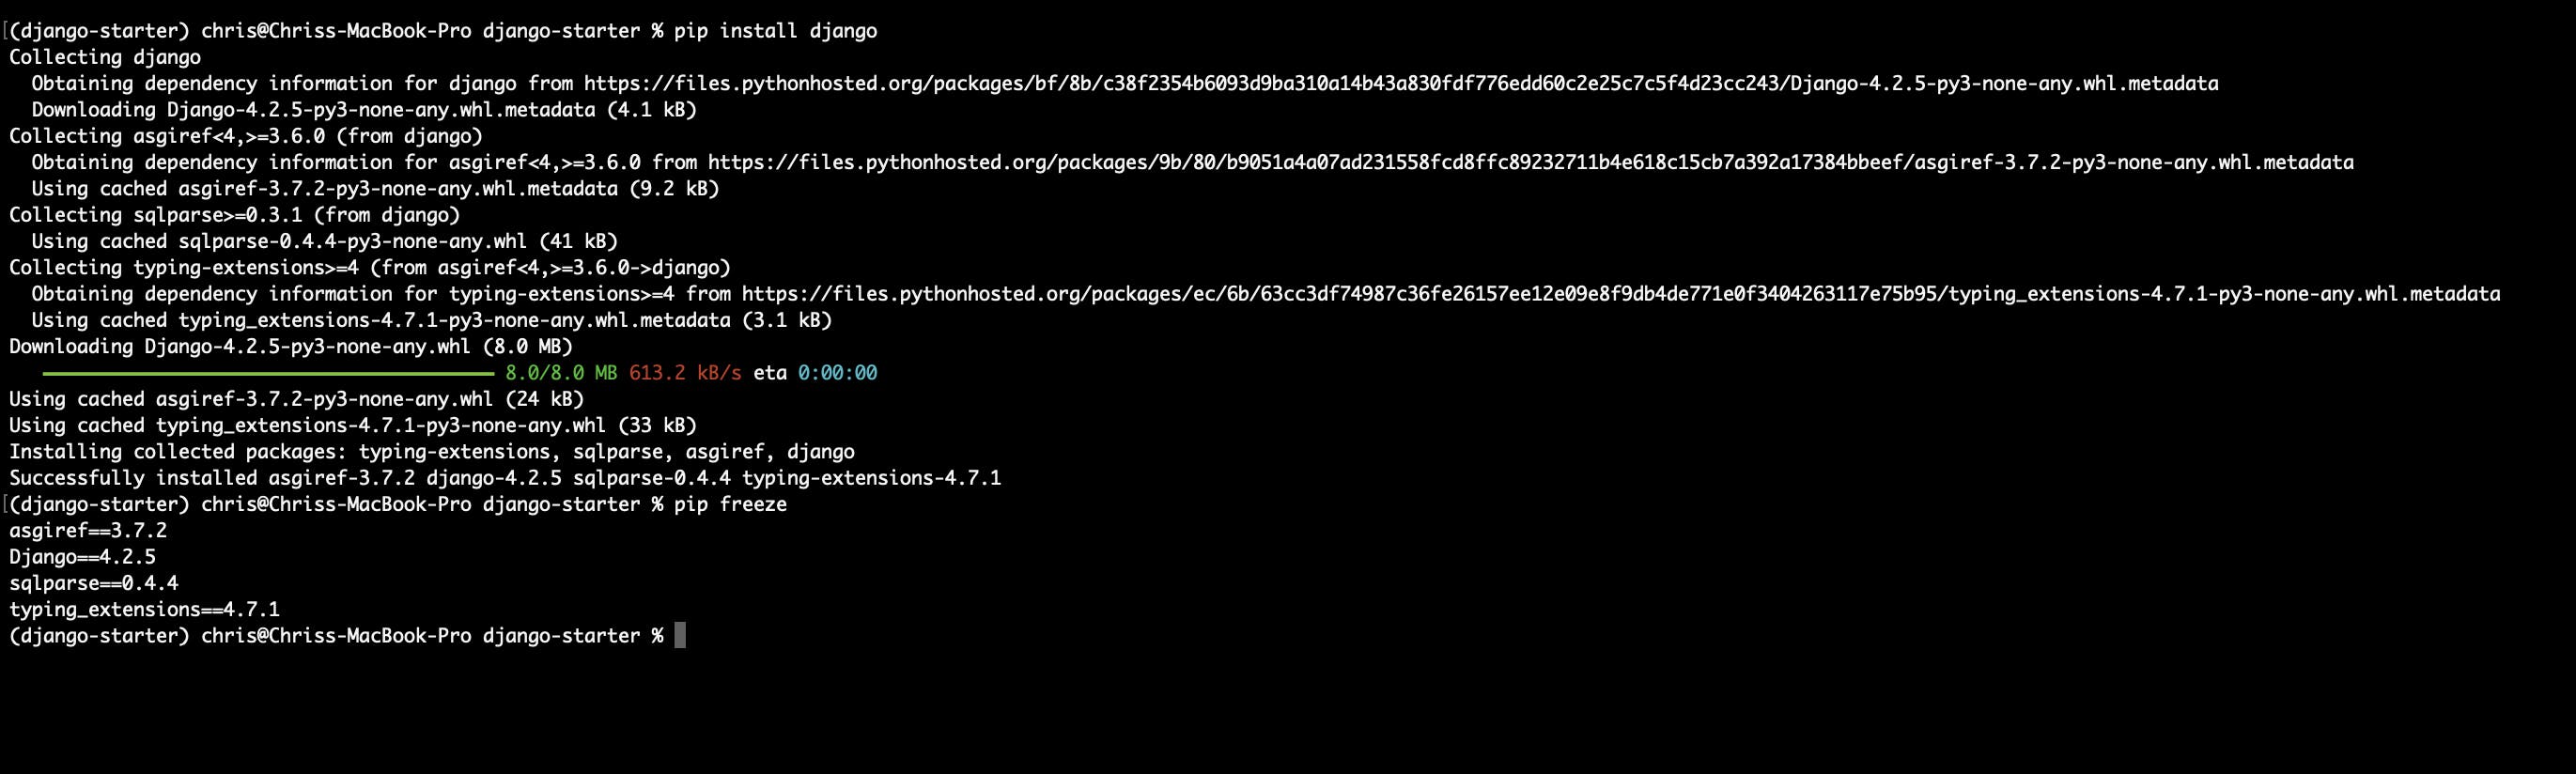
To install django, run the following on the terminal/CMD:
pip install django
To confirm a successful installation, you can use pip freeze to check for installed packages inside the environment:
pip freeze
Creating a Django project
Django has the simplest project structure, you simply create a single django project, where you can have a number of applications inside it. We will start by creating a Django project, and then proceed to creating applications inside it.
To create a project, run the following:
django-admin startproject <project_name>
Replace the <project_name> with the project name.
Here's how I prefer to do it since I'm in the root folder of my environment, I'd love all my project configurations to be there, I will therefore run the following to create a django project:
django-admin startproject config .

This will create the core files to run and configure your project: manage.py and a config directory where it will have main settings and URLs for the project.
Note that you won’t be editing the manage.py file. Inside the config directory, you will find a settings.py file that defines the database, middleware, and more configurations for a Django project.
(Optional Step)
Before we run the server, open the settings.py and go to the TIME_ZONE variable. Set the timezone to your local time zone (Really helps with real-time logging and debugging)
TIME_ZONE = 'UTC'
I will update my timezone to
TIME_ZONE = 'Africa/Nairobi'
To test for a successful setup, start the server by running the following:
python manage.py runserver
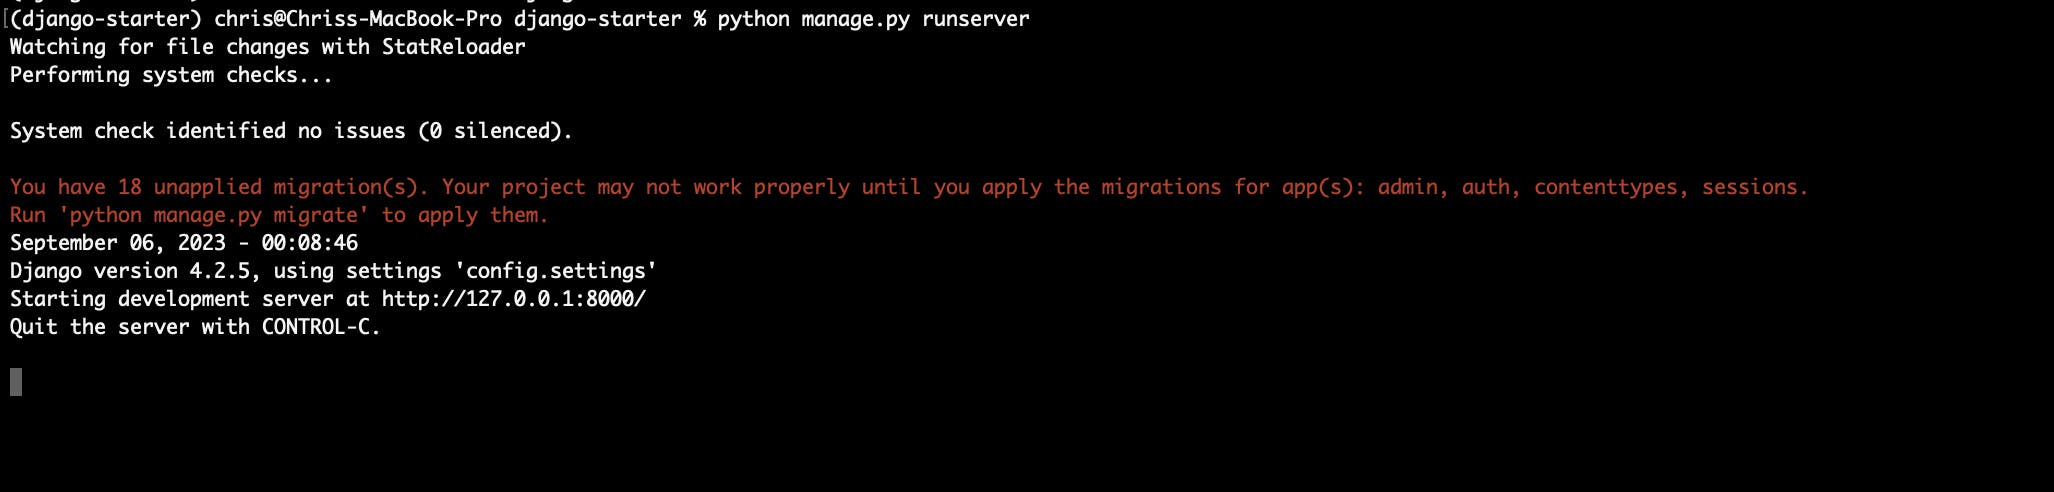
Django locally runs on port 8000:
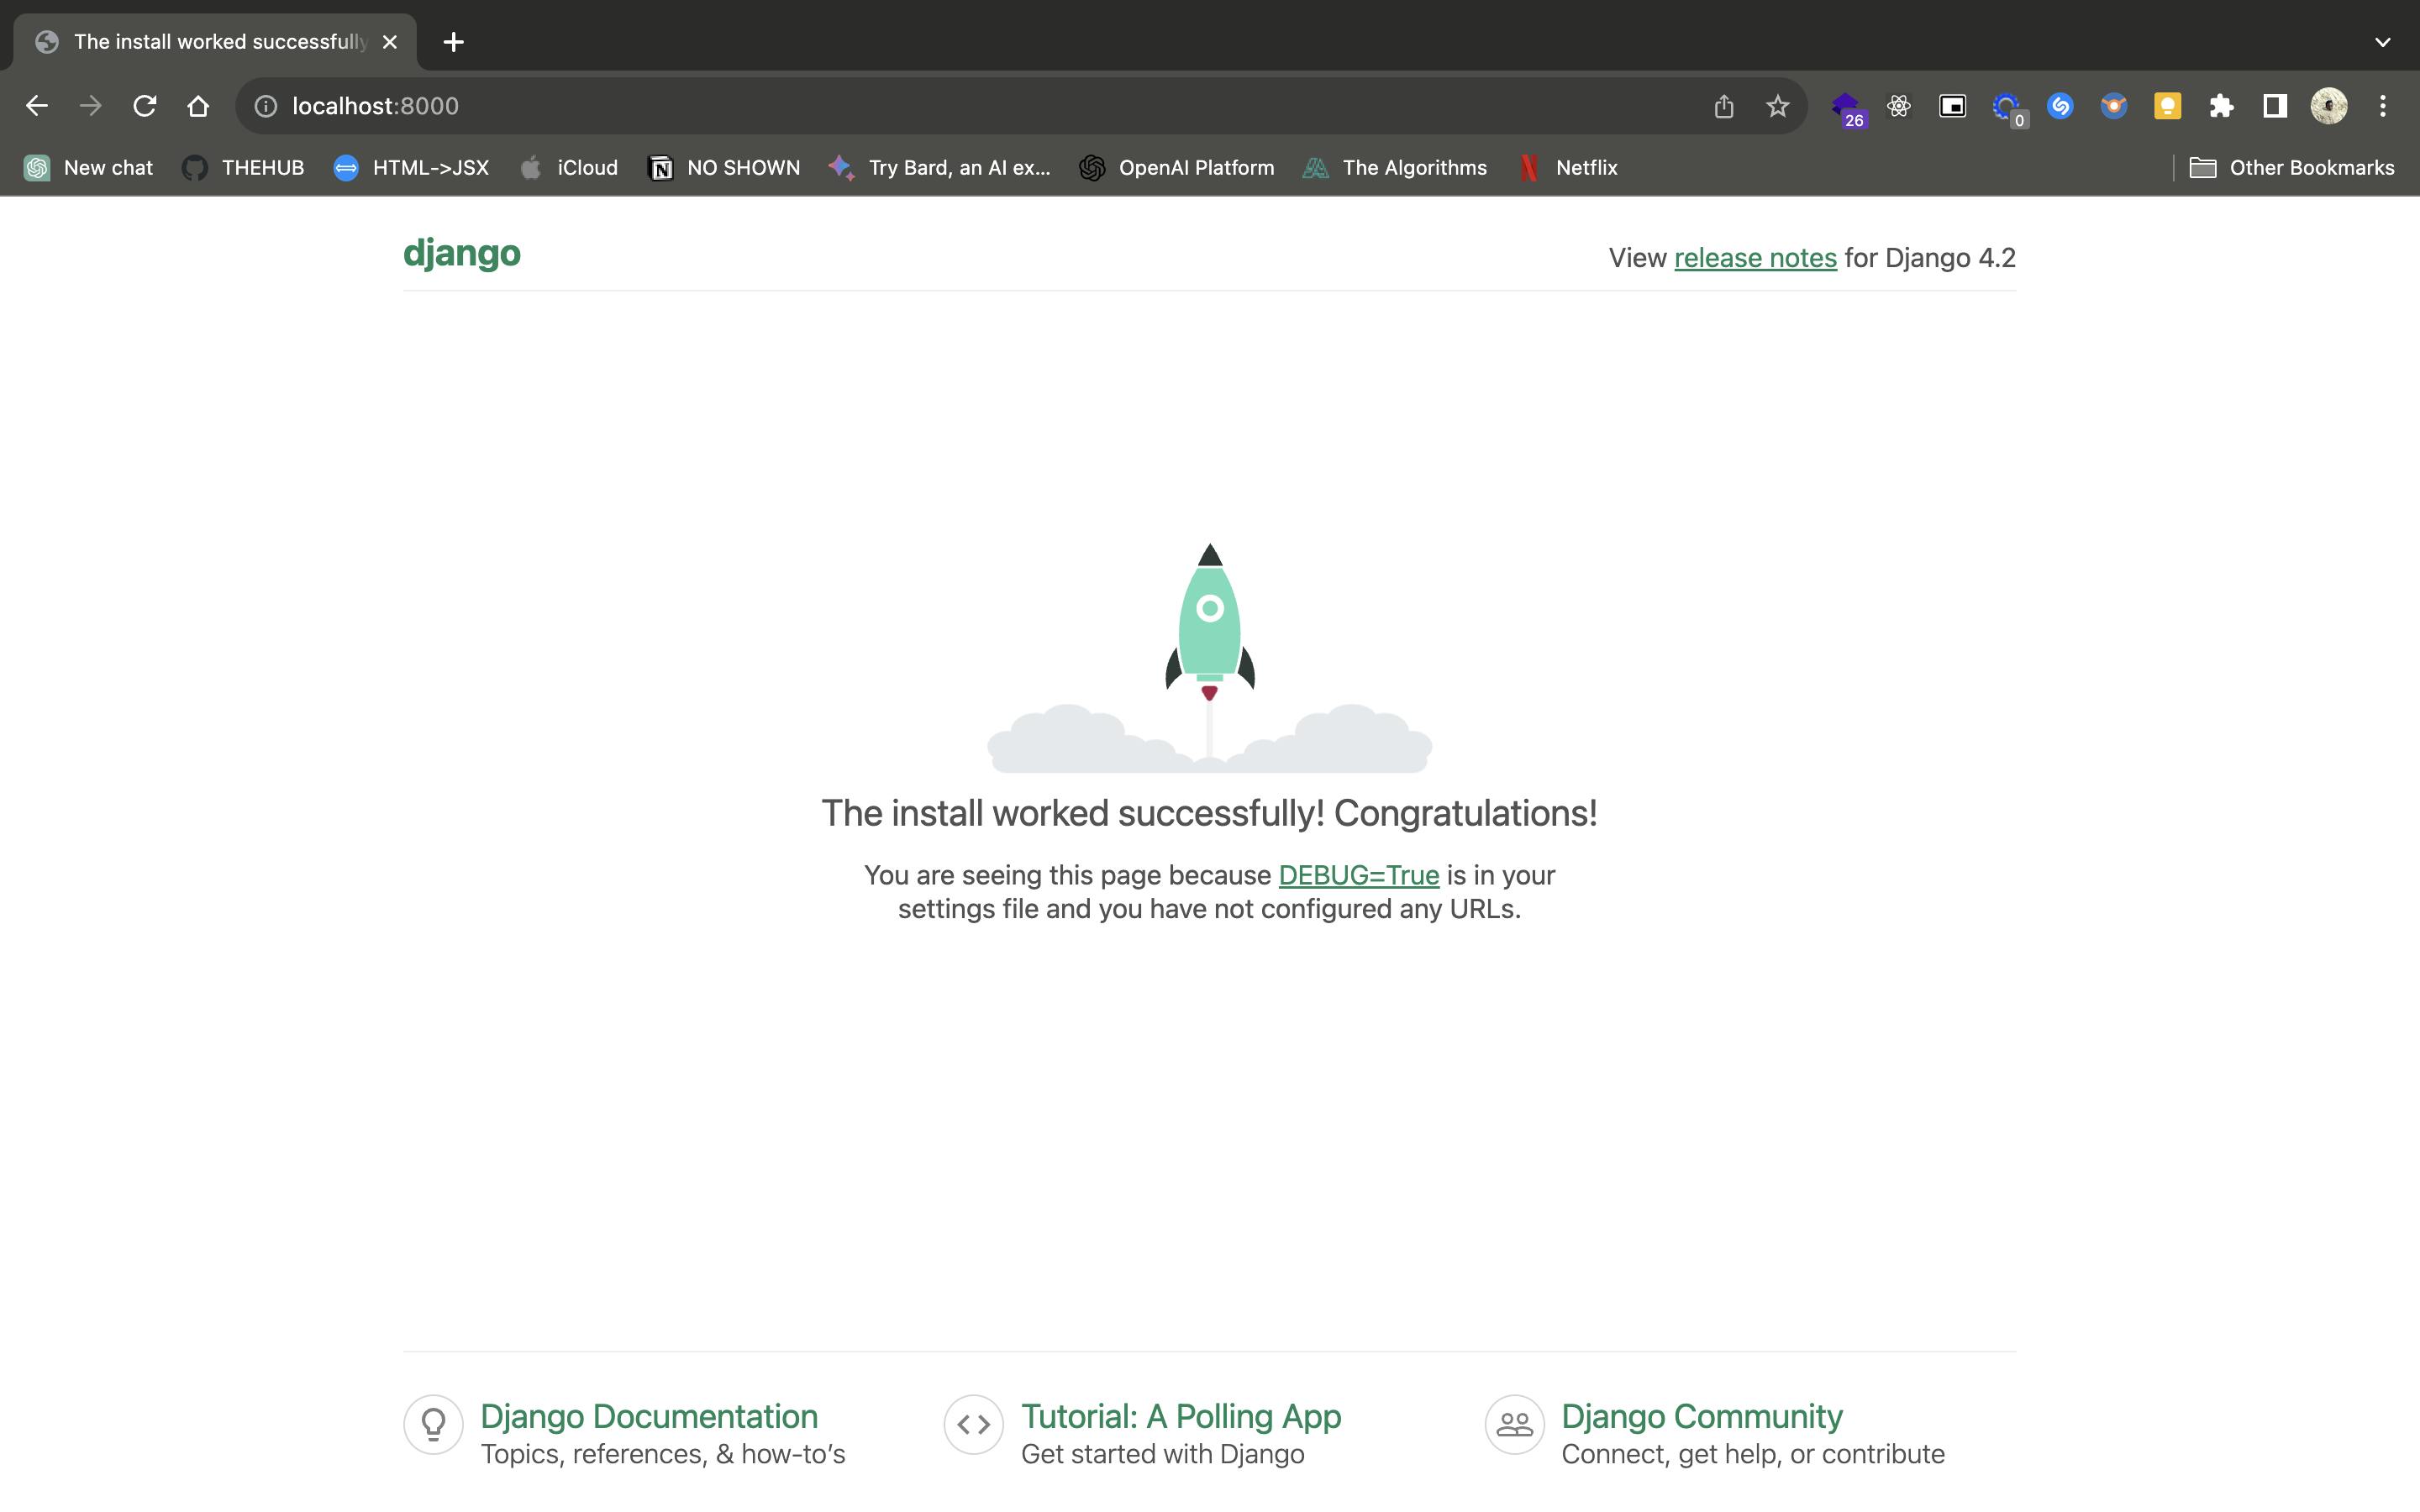
This confirms a successful setup.
Conclusion
This masterpiece has broken down the process of creating a Django project:
Setting Up an Environment
Activating an Environment
Installing Django
Creating a Django Project
Note: To deactivate the environment, run the following:
deactivate

What Next?
The next article will cover the following:
How to create applications in a django project
How to set Templates and Static files (CSS and JS)
Writing simple views and URLs